Title: Master the Art of Glass Cutting with OAIEGSD Glass Cutter | Role of Slitting Lines
Description:
Welcome to our comprehensive video guide on the Role of Slitting Lines and the effective use of the OAIEGSD Glass Cutter. In this video, we delve into the intricate world of glass cutting and provide you with valuable insights, tips, and techniques to enhance your glass cutting skills.
In the first part of the video, we explore the crucial role played by Slitting Lines in the glass cutting industry. Discover how Slitting Lines efficiently process glass sheets, ensuring accurate and precise cuts for various applications. Gain an in-depth understanding of the different components and functions of Slitting Lines, empowering you to make informed decisions when selecting the right equipment for your glass cutting needs.
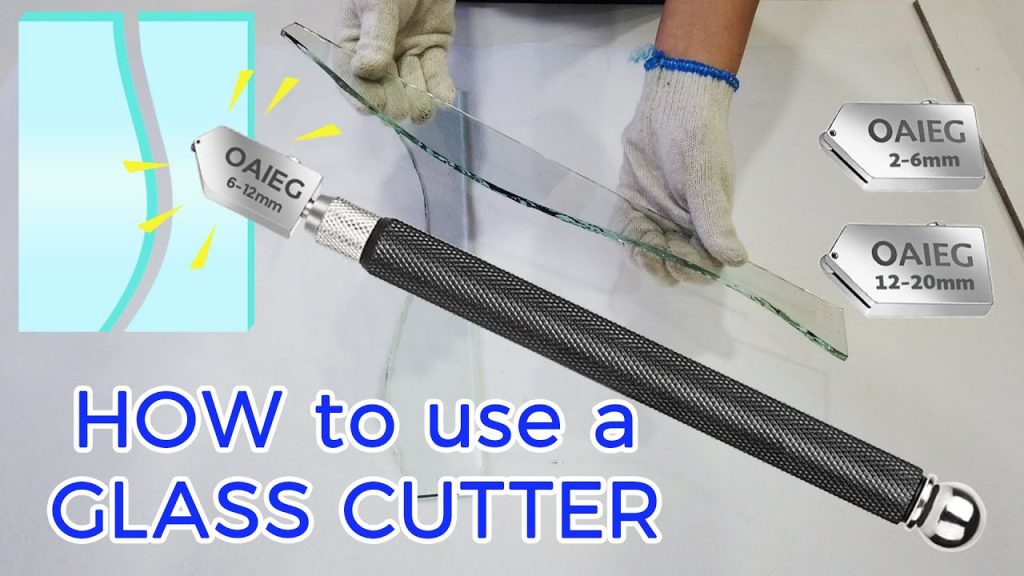
Moving on, we focus on the star of the show – the OAIEGSD Glass Cutter. With its premium quality and innovative design, this glass cutting tool is a game-changer for both professionals and DIY enthusiasts. We demonstrate step-by-step instructions on how to effectively use the OAIEGSD Glass Cutter to achieve flawless straight cuts, curve lines, and intricate designs on glass surfaces. Learn about its pencil style oil feed carbide tip, which ensures smooth cutting and minimizes the risk of cracks or breakage.
Throughout the video, we highlight key points, interesting facts, and pro tips to enhance your glass cutting skills. Whether you’re a beginner or an experienced glass artisan, this video provides valuable insights and techniques to take your craft to the next level.
To show your support and stay updated with our latest videos, don’t forget to like, subscribe, and share this video with fellow glass enthusiasts. Your engagement helps us create more informative content to inspire and educate our viewers.
Additional Tags: glass cutting, glass cutting techniques, glass cutting tools, glass cutting tips, slitting lines, OAIEGSD Glass Cutter, glass art, glass crafts, glass cutting tutorial
Hashtags: #GlassCutting #GlassCuttingTools #GlassArt #GlassCrafts #SlittingLines #GlassCuttingTechniques #OAIEGSDGlassCutter
Title: A Comprehensive Guide on Using the OAIEGSD Glass Cutter for Cutting Curve Lines
Introduction:
The OAIEGSD Glass Cutter is a highly efficient tool that allows users to cut precise curve lines on glass surfaces. In this guide, we will walk you through the step-by-step process of using this tool effectively to achieve accurate and clean cuts. With proper technique and practice, you’ll be able to master the art of cutting curve lines on glass effortlessly.
Materials Needed:
1. OAIEGSD Glass Cutter
2. Glass panel or sheet
3. Safety goggles
4. Work gloves
5. Measuring tape or ruler
6. Pencil or marker
7. Straight edge (optional)
8. Glass cleaner and cloth (for cleaning the glass surface)
9. A sturdy work surface or cutting mat
Step 1: Preparation
1. Ensure you are wearing safety goggles and work gloves to protect your eyes and hands from potential glass shards.
2. Clean the glass surface thoroughly using glass cleaner and a cloth to remove any dirt, debris, or fingerprints.
Step 2: Marking the Curve Line
1. Measure and mark the desired curve line on the glass surface using a measuring tape or ruler and a pencil or marker.
2. If needed, use a straight edge to draw a straight line connecting the start and endpoints of the curve line to guide the cutting process.
Step 3: Holding the Glass Cutter
1. Grasp the OAIEGSD Glass Cutter firmly with your dominant hand. Ensure a comfortable grip while maintaining control over the tool.
2. Adjust the cutting wheel of the glass cutter, making sure it protrudes slightly from the base. This will enable it to score the glass effectively.
Step 4: Scoring the Glass
1. Position the glass cutter at the starting point of the curve line.
2. Apply gentle and consistent pressure while smoothly gliding the cutter along the marked curve line. Maintain a steady pace to ensure an even and precise score.
3. Avoid stopping or lifting the cutter during the scoring process to prevent uneven or jagged lines.
4. Finish the scoring process by reaching the endpoint of the curve line.
Step 5: Breaking the Glass
1. Place the scored glass panel on a sturdy work surface or cutting mat.
2. Hold the glass panel along the scored line, using your non-dominant hand to support and stabilize it.
3. Apply even pressure to the opposite side of the scored line, gradually breaking the glass along the curve line.
4. Be cautious and apply pressure gently to avoid shattering the glass.
Step 6: Smoothing the Edges
1. Use a glass file or sandpaper to smooth any rough or sharp edges that may have occurred during the cutting process.
2. Take your time to ensure the edges are safe and smooth.
Conclusion:
By following these step-by-step instructions, you can effectively utilize the OAIEGSD Glass Cutter to cut curve lines on glass surfaces. Remember to prioritize safety by wearing protective gear and maintaining a steady hand throughout the process. With practice, you’ll gain confidence and achieve professional-grade curve cuts on glass.Steel Coil Slitting Line
#OAIEGSD_Glass #Cutter #Glass #Cutting #cut #curve #lines