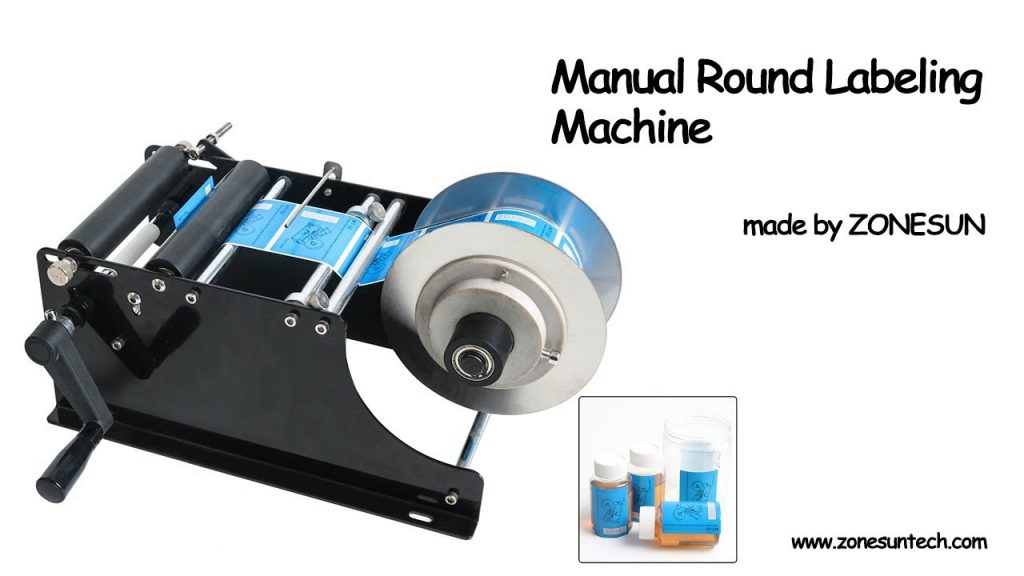
Welcome to our YouTube video on DIY Labeling Machines! If you’re looking for a reliable and efficient labeling solution for your small bottle labeling needs, you’ve come to the right place. In this video, we will guide you on how to use the Manual Round Labeling Machine with Handle to label small bottles with ease.
Labeling bottles manually can be a time-consuming and tedious task, especially when dealing with small bottles. That’s where our DIY Labeling Machine comes in handy. With its user-friendly design and efficient labeling capabilities, this machine is a game-changer for businesses in need of a labeling solution.
Before we dive into the details of how to use this labeling machine, let’s take a moment to understand its key features and benefits. The DIY Labeling Machine is designed to label round bottles with precision and accuracy. Its manual operation allows for maximum control, ensuring that each label is applied perfectly.
One of the standout features of this machine is its handle, which provides a comfortable grip and allows for easy rotation of the bottle during the labeling process. This ensures that the label is applied evenly and without any wrinkles or air bubbles. The machine also has an adjustable guide plate, allowing you to label bottles of different sizes effortlessly.
Now, let’s walk you through the step-by-step process of using the Manual Round Labeling Machine with Handle:
Step 1: Prepare the Machine
– Ensure that the machine is securely placed on a stable surface.
– Adjust the guide plate according to the size of the bottle you will be labeling.
Step 2: Prepare the Labels
– Make sure you have the correct size and type of labels for your bottles.
– Ensure that the labels are neatly stacked and ready for application.
Step 3: Attach the Label to the Machine
– Peel off the backing paper from the label and attach it to the labeling roller on the machine.
– Make sure the label is aligned properly on the roller.
Step 4: Position the Bottle
– Place the bottle in the machine’s cradle, ensuring that it is centered and aligned.
Step 5: Apply the Label
– Hold the machine’s handle firmly and rotate the bottle smoothly.
– As you rotate the bottle, the label will be applied automatically.
Step 6: Inspect and Repeat
– Check the applied label for any imperfections or misalignments.
– If necessary, make adjustments to the guide plate and repeat the labeling process.
Using the Manual Round Labeling Machine with Handle is a straightforward process that can significantly increase your labeling efficiency. With its ergonomic design and precise labeling capabilities, this machine is ideal for small businesses, crafters, and hobbyists who require professional-looking labels.
In conclusion, our DIY Labeling Machine offers a cost-effective and efficient solution for labeling small bottles. Whether you’re running a small business or simply labeling bottles for personal use, this machine will streamline your labeling process and ensure consistent and accurate results.
Thank you for watching our YouTube video on DIY Labeling Machines. We hope you found this tutorial helpful. If you have any further questions or would like to explore our range of labeling solutions, please visit our website. Labeling Machine
“Efficiently Label Small Bottles with a Manual Round Labeling Machine: Step-by-Step Guide & DIY Tips”