Title: “Automated Plastic Injection Machine – DIY Injection Moulding at Its Best!”
Description:
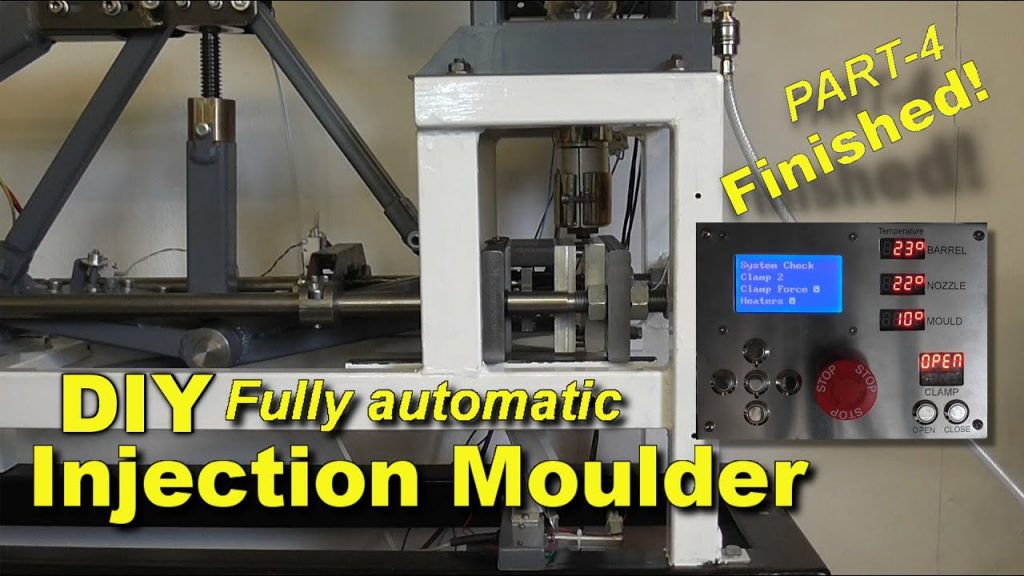
Welcome to our groundbreaking video showcasing the Automatic Plastic Injection Machine – a revolutionary DIY project that has transformed the way injection moulding is done. In this video, we present the completed machine, which can now run automatically and unattended, ensuring a hassle-free and efficient operation.
With the ability to detect and halt operations when encountering any issues, this machine guarantees safety and reliability. Although some finishing touches are still needed, its functionality is truly remarkable.
Here’s a breakdown of the video’s content:
Introduction:
In this video, we delve into the Automatic Plastic Injection Machine, highlighting its key features and advantages. Discover how this DIY project has revolutionized the injection moulding process, making it accessible to enthusiasts and professionals alike.
Video Content:
1. Overview of the Automatic Plastic Injection Machine: We provide an in-depth look at the machine, its components, and how it operates. Learn about its automatic and unattended functionality, ensuring a seamless production process.
2. Operation Steps: Follow along as we demonstrate the step-by-step process of using the machine. From setting it up to initiating the injection moulding process, we cover all the essential steps required to achieve successful results.
3. Key Highlights and Interesting Facts: Throughout the video, we showcase the machine’s impressive capabilities, highlighting any notable features, such as its ability to detect problems and stop operations. We also share interesting facts about its development and potential applications.
Call to Action:
If you found this video informative and inspiring, we encourage you to hit the like button, subscribe to our channel for more exciting content, and share this video with others who might find it valuable. Stay tuned for future updates on our DIY projects and innovative solutions.
Additional Tags and Keywords:
Automatic Plastic Injection, DIY Injection Moulding, Injection Moulding Machine, Automatic Machine, Unattended Operation, Finishing Touches, DIY Project, Revolutionizing Injection Moulding, Step-by-Step Guide, Injection Moulding Process, Safety and Reliability, Innovative Solutions, DIY Enthusiasts, Professional Applications.
Hashtags:
#AutomaticPlasticInjection #DIYInjectionMoulding #InjectionMouldingMachine #RevolutionaryDIY #UnattendedOperation #InnovativeSolutions #DIYEnthusiasts
Here’s a simple example of a tilter for a DIY automatic injection moulding machine:
“`python
import RPi.GPIO as GPIO
import time
class Tilter:
def __init__(self, tilter_pin):
self.tilter_pin = tilter_pin
GPIO.setmode(GPIO.BCM)
GPIO.setup(self.tilter_pin, GPIO.OUT)
def tilt_forward(self, duration):
GPIO.output(self.tilter_pin, GPIO.HIGH)
time.sleep(duration)
GPIO.output(self.tilter_pin, GPIO.LOW)
def tilt_backward(self, duration):
GPIO.output(self.tilter_pin, GPIO.LOW)
time.sleep(duration)
GPIO.output(self.tilter_pin, GPIO.HIGH)
def cleanup(self):
GPIO.cleanup()
# Usage example
if __name__ == “__main__”:
# Define the GPIO pin for the tilter
tilter_pin = 17
# Create an instance of the Tilter class
tilter = Tilter(tilter_pin)
try:
while True:
# Tilt forward for 1 second
tilter.tilt_forward(1)
time.sleep(1) # Pause for 1 second
# Tilt backward for 1 second
tilter.tilt_backward(1)
time.sleep(1) # Pause for 1 second
except KeyboardInterrupt:
tilter.cleanup()
“`
This code assumes that you are using a Raspberry Pi and have the RPi.GPIO library installed. It initializes the tilter pin as an output pin, and then provides methods to tilt the machine forward and backward for a specified duration. The `cleanup()` method is used to clean up the GPIO pins when the program is terminated. In the usage example, the tilter is tilted forward and backward repeatedly until the program is interrupted with a keyboard interrupt (Ctrl+C).Plastic Injection Machine
#DIY #automatic #injection #moulding #machine #finished